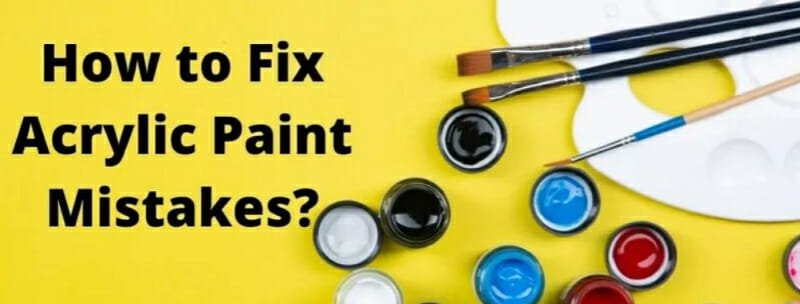
Are you looking for how to fix acrylic paint mistakes? It is important that you look at your problem objectively before you attempt to correct it. You may need to take a break. Take a break, go for a walk or have a cup of tea. Then, wake up the next morning with fresh eyes.
Sometimes we can get too emotionally involved with our artwork. If something isn’t working out, it only increases our frustration.
This can cause us to act without thinking clearly and try to fix the problem. This can only make the problem worse.
For instance, you may be tempted to just paint over a shadow that’s all wrong. The color will bleed through if the paint is not allowed to dry.
This can lead to an endless cycle of painting and paint buildup that isn’t consistent with the rest of your painting.
Instead of searching for a quick fix, think about this:
- Is the paint still damp or dried?
- Is it worth my time to try and resolve it while it is still wet? Or should I just let it go and get on with the business of dealing with it later?
You can erase your mistakes, no matter if your paint is oily, acrylic, or wet, and start over with a white background.
Keep in mind, however, that you might lose some of your substrate’s “tooth”, or original texture, as you add, subtract, and rebuild paint. This is especially important when you are working with canvas. Although it may not seem obvious, this could be a problem.
How to fix acrylic paint mistakes?
Acrylics are less forgiving than oils, but more so than water colors. Even if the error is not as obvious as the background, you can still correct it.
Acrylic paint can be repaired even after it has dried completely, contrary to popular belief. Start with a few words of wisdom on the right foot: Acrylic paint for beginners step by step.
There are many ways to fix a mistake. It is important to weigh all options before you make any decisions. Thin layers of paint or thick layers, dry or wet. Next, I’ll show you how to apply the paint thinly or thickly.
How to correct acrylic paint mistakes you need to know how to approach each solution in order to make the best decision. Acrylic paint is much faster to dry than oil paint.
Acrylic paints must be repaired after they dry. You can also use some techniques with dry oil paints. They are, however, often used to acrylic paint mistakes can be fixed.
Here are some ways to correct an error in your acrylic painting.
- Use fine sandpaper to apply light sanding to the area that you wish to paint.
- Sometimes, paint layers can become wet beneath. To remove wet oil paint layers, use a paint knife.
- Continue to remove paint until you attain the desired level.
- To remove any paint residue or dust, you can use a damp cloth (moistened with water for acrylics). This will prevent any unwanted texture or indications from damaging the paint.
- After that, let it dry completely before applying any other products. The area should be dry because acrylic paint is used.
- Apply two coats of titanium white once the area has dried. These coats should dry thoroughly before you apply anything.
- After the white titanium layers are dry, you can begin painting. The mistake can be corrected by painting over the areas you have been working on.
These steps will help you correct any errors you make in acrylic painting. This will save you time and allow you to stop starting the entire process each time you make a mistake. These steps must be followed exactly.
If you see any of these, you’ll know you’re creating more problems than you solve. It is important to wait for the paint to dry before you attempt to fix the problem with wet paint.
This could cause damage to artworks that didn’t need any work. You can fix any errors in an acrylic painting by following these steps.
How do you fix dry paint?
You will use this dry-paint technique most often with acrylics because of the speed at which that paint dries, but it can be used for dry oils as well.
- Use fine sandpaper to gently sand the area you want to paint.
- If you find any wet paint on the bottom layers of your painting, use your palette knife to remove it.
- Continue to remove paint until you reach the surface.
- To remove dust and paint, use a damp cloth (linseed oils for oils, water for acrylics).
- Let the area dry completely before applying two coats of titanium paint. Each coat should dry completely before you continue.
- Once the white base has dried, you can begin painting.
How do you fix the paint that is still wet?
Oils do not dry as fast as acrylics, so these techniques may work best with those paints. These techniques may still work if you are able to catch an acrylic error quickly.
- Scrape off as much paint as possible with a painting knife, a thick piece of paper, or even an old credit card.
- Continue to wipe away paint using a soft cloth until all is removed. Make sure your cloth doesn’t drag on other areas of the painting.
- Add a little linseed oil and oil to a piece of cloth. Wipe off any paint. Add a small amount of water to acrylics. To avoid liquid running down your painting, make sure that your cloth is not too damp.
- Once you have removed all paint, let the area dry completely. Oil paintings may take up to three days to dry.
- Once dry, paint the area in two layers of titanium white. Allow each layer to dry.
- Keep painting.
Tonking: Another technique for oil painting is called “Oil Painting”. It’s used to give texture to thick paints, but it can also be used to correct mistakes in painting.
- Take a piece of newspaper or another paper and cut it to the size of the area you want to remove the paint.
- It can be placed on the paint and pressed with your hands. (If necessary, support the canvas with your palm).
- Gently tear the paper away.
- Continue the process until you are satisfied with the results.
- To remove excess paint, you can use a dampened cloth with linseed oils to clean it off.
You can also watch this video: How to fix acrylic paint mistakes
FAQs
Can you paint over mistakes acrylic?
Ans: Yes, you can paint over mistakes with acrylic paint. However, it’s important to make sure the surface is completely dry before painting over it since acrylic paint can be difficult to remove once it dries.
Can you paint over dried acrylic paint?
Ans: Yes, you can paint over dried acrylic paint. However, you may need to apply a primer first to ensure the new paint adheres properly.
How do you fix a ruined painting?
Ans: There are a few ways to fix a ruined painting. One way is to try and restore the painting using restoration techniques. Another way is to create a replica of the painting.
How do you redo acrylic paint?
Ans: To redo acrylic paint, you will need to clean the surface of the paint with a solvent like turpentine or mineral spirits. Then, you can apply a new coat of paint.
How to fix acrylic paint on plastic?
Ans: Acrylic paint can be difficult to remove from plastic, but there are a few methods that can help. One is to use a degreaser, such as a dish soap or Goo Gone, to break down the paint. Another is to use a heat gun or hair dryer to soften the paint and make it easier to remove.
How to fix acrylic paint on fabric?
Ans: If the acrylic paint is still wet, you can try to remove it by blotting it with a clean cloth. If the paint is dry, you can try to remove it by gently scraping off the paint with a blunt object such as a butter knife. If that doesn’t work, you can try to dissolve the paint by applying a solvent such as acetone.
Conclusion:
There are several ways to fix acrylic paint mistakes. However, the sooner you address the mistake, the easier it will be to fix. If the paint is still wet, you can use a brush or your finger to smooth it out. If the paint is dry, you can use an eraser, sandpaper, or a nail file to fix it. Be sure to test the methods on a small area before applying them to the entire painting.


Leave a Reply
You must be logged in to post a comment.